User management
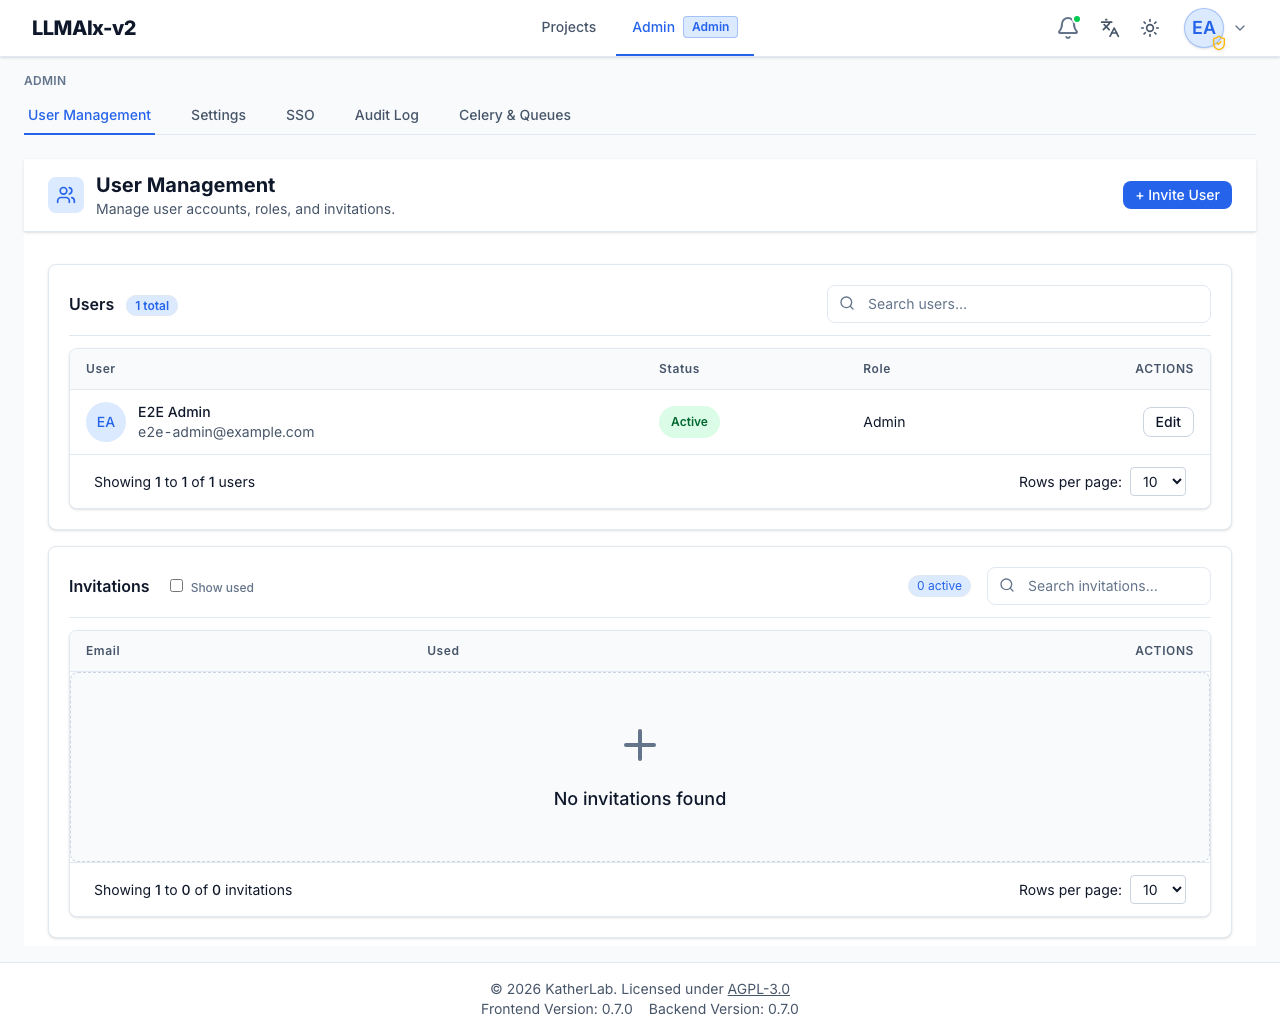
User Management (/admin/user-management) handles user accounts and
invitations. It is the default landing page for /admin. The page has two
cards — Users and Invitations — each with its own search box and count
badge.
Inviting users
+ Invite User (top-right) opens a modal that creates an invitation for an email address, with an optional Send invitation via email toggle:
- With the toggle on and email configured, the app emails the invitation link to the address.
- With the toggle off, or if email delivery isn't configured, the app shows
the invitation link (
.../register?token=…) with a copy button so you can share it manually. A banner tells you whether the email actually went out.
The invited person opens the link, lands on the registration page with the token pre-filled, and sets their own name and password.
The Invitations card lists each invitation's email and whether it's been used. Used invitations are hidden by default; tick Show used to include them. The count badge shows the number of still-active (unused) invitations, and the search box filters by email. Invitations can be deleted (this only removes the invite; it doesn't affect anyone who already registered with it).
Managing users
The Users table shows each user's avatar (initials), name and email, status (Active/Inactive), and role (User/Admin). The count badge shows the total number of users and the search box filters by name or email. Columns are sortable and the list is paginated (10/25/50 per page).
Click a user row (or Edit) to open the editor, which has three sections:
- General — full name, email, role (User/Admin), and status (Active/Inactive, toggled with a switch). Changes are only sent for fields you actually modified.
- Set Password — type a new password and click Set to reset it for that user (independent of the Save Changes button). Useful for onboarding or helping a locked-out user.
- Danger Zone — Delete User.
Save changes commits the General-section edits; Set commits a password immediately on its own; the modal reports success or the specific error for each.
You can't change your own role or status
To prevent lockouts, an admin cannot change their own role or deactivate their own account from this screen — the role dropdown and the status switch are disabled for your own row, with a note explaining why.
Deleting a user cascades
Deleting a user permanently removes the account and all data owned by that user — their projects, files, documents, schemas, prompts, extraction runs, and evaluations, plus their uploaded files in storage. A confirmation dialog requires you to confirm before the deletion runs.
Roles
There are two roles:
- User — can create and work within their own projects.
- Admin — everything a user can do, plus access to the entire
/adminsection (settings, SSO, audit log, task monitoring, and this page).
Cross-project visibility for admins is gated separately by the
ADMIN_ALL_PROJECT_ACCESS environment flag; by default admins do not
automatically see other users' projects.
Account lockout
There are two distinct mechanisms:
- Manual — setting a user Inactive blocks their login until reactivated. This is a deliberate administrative action you take from the editor's status switch.
- Automatic — after too many failed login attempts, an account is temporarily
locked for a configured number of minutes and then unlocks itself. Successful
login resets the counter. The thresholds are set by
LOGIN_MAX_ATTEMPTSandLOGIN_LOCKOUT_MINUTES.
There is no explicit "unlock" button — either wait out the automatic lockout, or toggle the user's status to Inactive and back to Active. Both lockouts and account-status changes are recorded in the audit log.