Preprocessing
Preprocessing turns your uploaded files into plain text that an LLM can read. For PDFs and images this means OCR / text extraction; for spreadsheets it converts rows or the whole table into text.
Not a separate tab
Preprocessing is driven from the Files tab: select the files you want to process, then open the configuration panel from the batch action bar. Each file's runs and results are tracked in its Preprocessing History.
The configuration panel
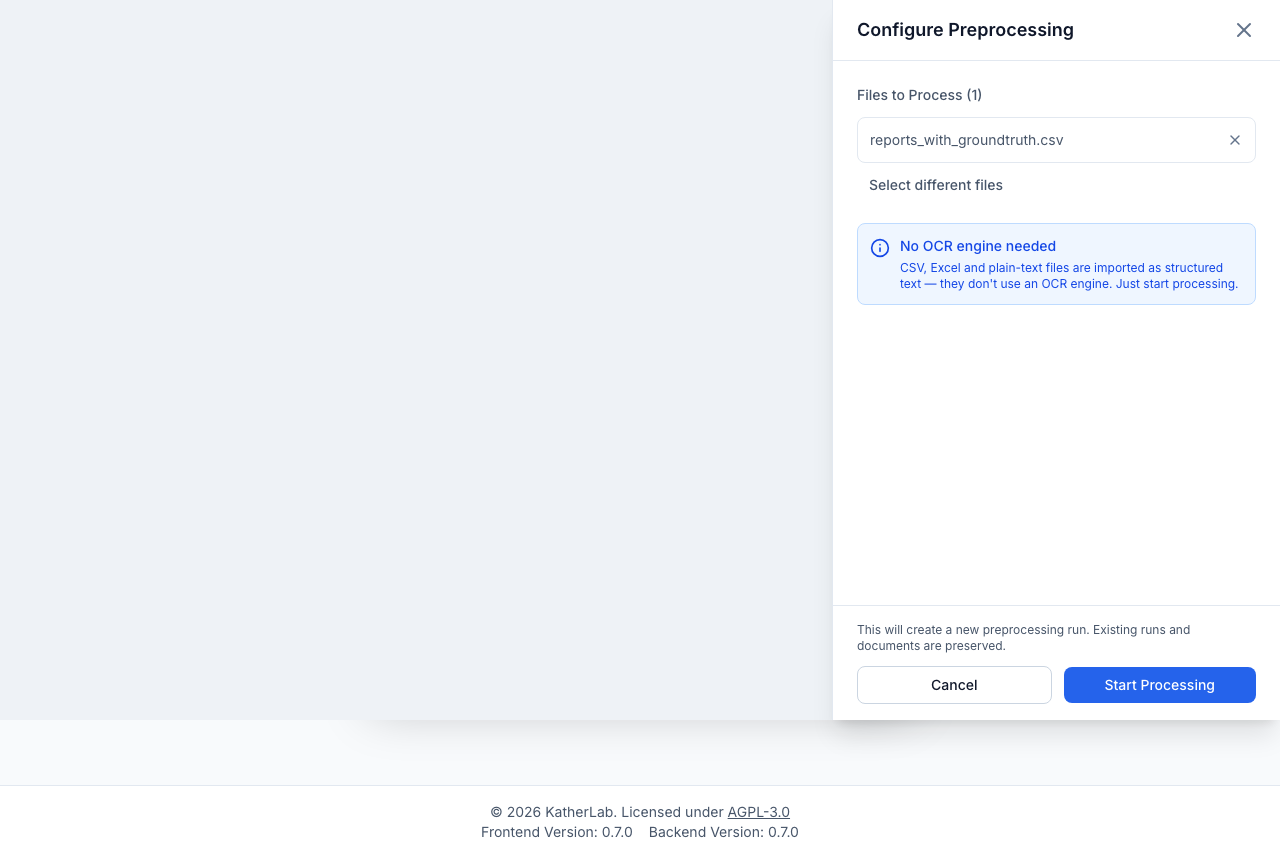
Configure Preprocessing opens a right-hand slide-over. At the top it lists the files to process, each with an X to drop it from the batch, plus a Select different files link that clears the selection and closes the panel so you can re-pick. Below that sit the engine choice, options, and a Start Processing footer.
Choosing an OCR engine
When your selection contains files that need OCR (PDFs and images), pick one of the engines your administrator has enabled. Each appears as a selectable card with an icon, a display name, and a short subtitle; the picked card is highlighted. Only enabled engines are shown, and the first enabled one is pre-selected. For a detailed description of each engine and when to use it, see OCR engines.
| Engine | Best for | Notes |
|---|---|---|
| Quick (Local OCR) | Everyday scans, no API needed | Docling / Tesseract, runs locally. |
| Mistral OCR | Complex layouts | API-based (hosted Mistral or self-hosted DeepSeek-OCR-2). |
| Vision LLM | Complex / difficult documents | Any OpenAI-compatible vision model. |
Text-only files need no OCR
CSV, XLSX, and TXT files are imported as structured text and never touch an OCR engine. If your selection is only text/table files, the panel hides the engine cards and shows a "No OCR engine needed" notice — you can start immediately. The moment the selection also contains a PDF or image, the engine chooser reappears. (A file whose type is unknown is treated as OCR-requiring, to be safe.)
If your selection needs OCR but no engine is enabled, the panel shows a red "OCR required" callout, blocks the run, and tells you to enable one in system settings.
Configure spreadsheets first
If any selected CSV/XLSX file still lacks an import configuration, a warning callout lists them and the Start Processing button is disabled until they are configured.
Options
- Force OCR for PDFs — an amber toggle that skips embedded-text extraction and OCRs every page. Useful when a PDF's embedded text is wrong or missing. Only shown when the selection contains PDFs and an engine is enabled.
- Vision prompt — when Vision LLM is the selected engine, a text box lets you set the instruction sent to the vision model. It defaults to "Extract all text from this image and return it as clean markdown."
- Advanced options — a collapsible section (reset to collapsed each time the
panel opens) with per-engine overrides:
- Local OCR — Tesseract Language: Auto-detect by default, or pick a specific language (English, German, French, Spanish, Italian, Portuguese, Dutch, Polish, Russian, Simplified Chinese, or Latin). A specific choice is sent as the Docling OCR language; Auto-detect sends nothing.
- Mistral OCR — API Key and Model overrides. Leave empty to use the
server defaults (the model placeholder is
mistral-ocr-latest). - Vision LLM — API Key, Base URL (e.g.
https://api.openai.com/v1), Model, and a Max image dimension (400–4096 px). Leave the key, base URL, and model empty to use the server defaults.
Overrides are per-run and optional
Every advanced field left blank falls back to the administrator's server configuration. Values you enter apply only to this preprocessing run and are not saved as a preset.
Embedded text is reused
For a PDF that already contains selectable text, that text is extracted directly and the result is identical regardless of the OCR engine — unless you enable Force OCR. See the embedded-text threshold under OCR engines.
Starting a run
The panel footer carries a short reassurance note and two buttons: Cancel and Start Processing. Start Processing stays disabled until the selection is valid — files are selected, any spreadsheets are configured, and (for an OCR-requiring selection) an enabled engine is picked. It also shows a loading state and reads "Processing…" while the run is being dispatched.
Click Start Processing. Before dispatching, the app may show a preview dialog if it detects:
- PDFs with embedded text — informs you the text will be extracted directly.
- Existing documents with the same configuration — running again creates new versions and archives the old ones. You can tick Only process files without existing documents to skip already-processed files.
- Existing documents with a different configuration — both versions are kept side by side.
Each run is additive: "Existing runs and documents are preserved."
Progress, cancellation, and completion
- A global banner shows "Preprocessing — X of Y files · Z failed" with a progress bar and an ETA. Progress updates live.
- Cancel stops the run; files still in progress are marked failed. You'll be asked to confirm.
- When the last run finishes, a completion callout summarizes "N documents created · M files failed" with View errors and View documents shortcuts.
Preprocessing history
Each file's Preprocessing History slide-over lists every run (engine, start time, duration, status) with:
- A live progress bar for active runs.
- A per-file breakdown with processing time and, on failure, a View error expander.
- Warnings — e.g. "N skipped rows" for row-by-row imports where the selected text columns were empty (each skipped row is listed with a reason).
- Links to the resulting documents or group.
- Retry failed files, Cancel (active runs), and Run new preprocessing actions.
Non-obvious behaviors
- File status reflects each file's own subtask — so if one file in a batch fails, the others still show their true status.
- Spreadsheets must be import-configured before they can be preprocessed; the UI blocks and guides you through it.
- Row-by-row imports skip rows whose selected text columns are all empty, and report them as warnings rather than failing the whole file.
Next step
The text this step produces becomes your Documents.