Files
The Files tab is where you upload and organize the source documents for a project. It is the entry point of the workflow — everything downstream operates on what you upload here.
Supported types: PDF, PNG, JPG/JPEG, DOC, DOCX, CSV, XLSX, TXT.
Uploading files
- Click Upload Files (top-right), or on an empty project drag files onto the dropzone or use Browse Files.
- You can select multiple files at once. Uploads run one file at a time; a progress panel shows "Uploading file X of Y", an overall bar, and a live "N succeeded · M failed" count.
- Cancelling mid-batch keeps files already uploaded and skips the rest — you'll be asked to confirm (Cancel uploads / Keep uploading).
- If some files fail, the modal stays open with a Failed uploads list (each showing the filename and reason) so you can retry them.
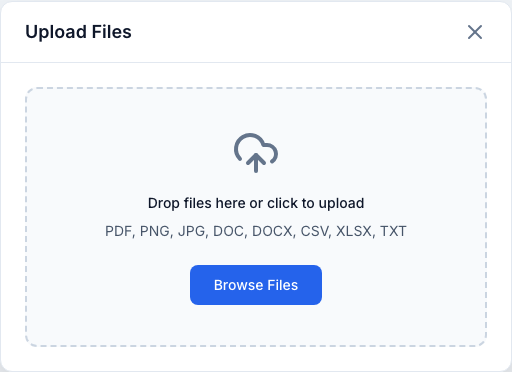
The modal has two states:
- Idle — a compact dropzone; drop files onto it or click to browse. The dropzone highlights while you drag files over it.
- Uploading / summary — replaces the dropzone once a batch starts. It shows an overall progress bar with a running percentage, the current file's name and its own progress bar, and a live "N succeeded" count (plus a red "· M failed" when any file fails). On completion the overall bar turns amber if there were failures, and a Close button appears.
The upload can't be dismissed by accident
While a batch is uploading, clicking the backdrop or pressing Esc does not close the modal — only the explicit X or Cancel button stops it. The cancel button reads "Cancelling…" while the loop winds down.
Duplicate detection
Files are hashed (SHA-256) on upload. Uploading a file that already exists in the project is rejected as a duplicate — the app tells you which existing file it matched, rather than creating a copy.
There is a maximum file size (enforced during upload — see MAX_UPLOAD_SIZE_BYTES
in Configuration); oversized files are
rejected.
Finding files
When a project has files, a filter bar appears above the table:
- Search — matches filenames (debounced as you type).
- Status —
All, Not Processed, Processing, Completed, Failed (derived from each file's latest preprocessing run). - File Type — PDF, PNG, JPEG, CSV, XLSX, XLS, TXT, DOC, DOCX.
- Date Range — Today, Yesterday, Last 7 Days, Last 30 Days, or a Custom Range (pick From / To and click Apply).
Active filters show as removable chips; Clear All Filters resets everything.
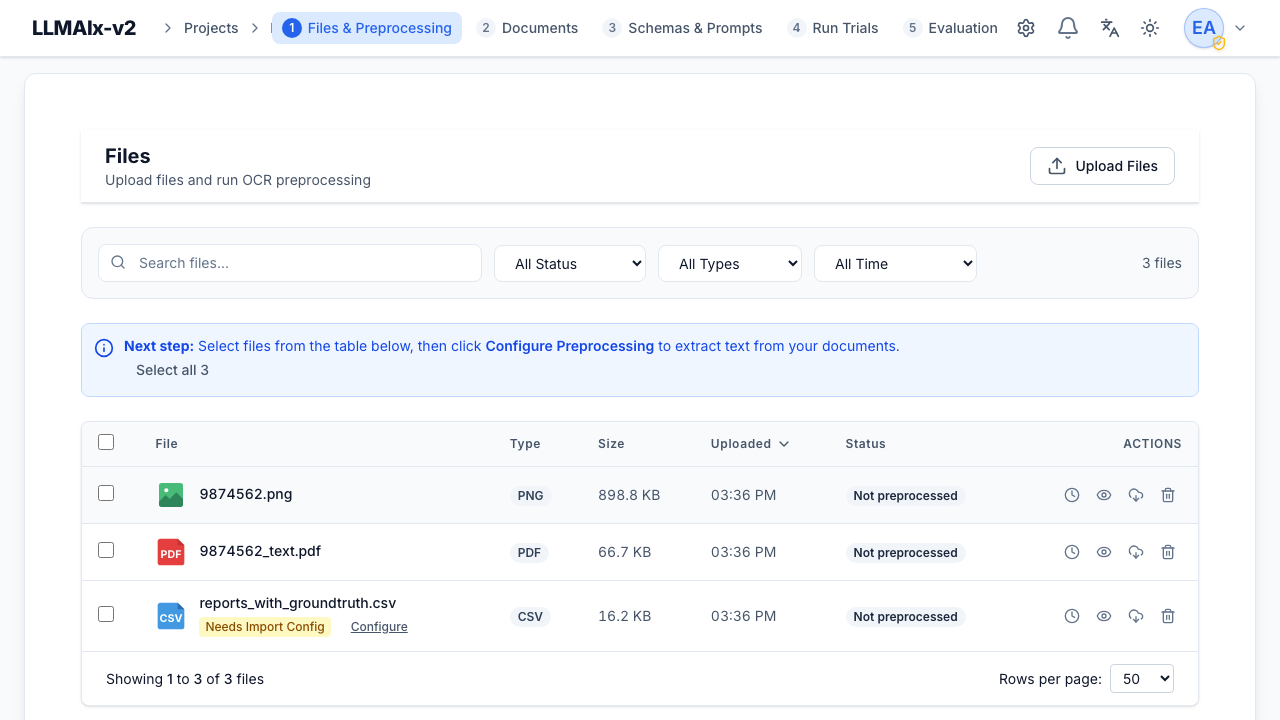
The files table
Columns — File, Type, Size, Uploaded, Status — are all sortable (default: newest first). The File column pairs a type icon with the filename; a spreadsheet that still needs configuring carries a yellow Needs Import Config badge here (see Configuring CSV / XLSX imports).
The Status column reflects the file's latest preprocessing run and reads as one of:
| Status | Meaning |
|---|---|
| Not Processed | Uploaded but never preprocessed yet. |
| Processing | A preprocessing run is currently in progress. |
| Completed | Preprocessing finished and produced documents. |
| Failed | The most recent run failed for this file. |
Each row has actions:
- Preprocessing History — see every run for this file.
- Preview — open the file preview.
- Download — download the original file.
- Delete — remove the file (see Deleting).
Select rows with the checkboxes (or the header select-all). Page sizes are 25 / 50 / 100 / 250.
Select all across pages
With a large project, the Select all {total} button in the info callout selects every file matching the current filters — across all pages — so you can preprocess a whole project in one go.
Previewing files
The preview opens as a slide-over. Its header shows the file's icon, name, size and MIME type; the footer shows the created date, the first eight characters of the file's hash, and any description. When you open the preview from the table (which passes the current file list), the header also gains prev/next buttons and an X / Y position counter, and the ← / → keys move between files (ignored while you're typing in a field). A Download button is always available.
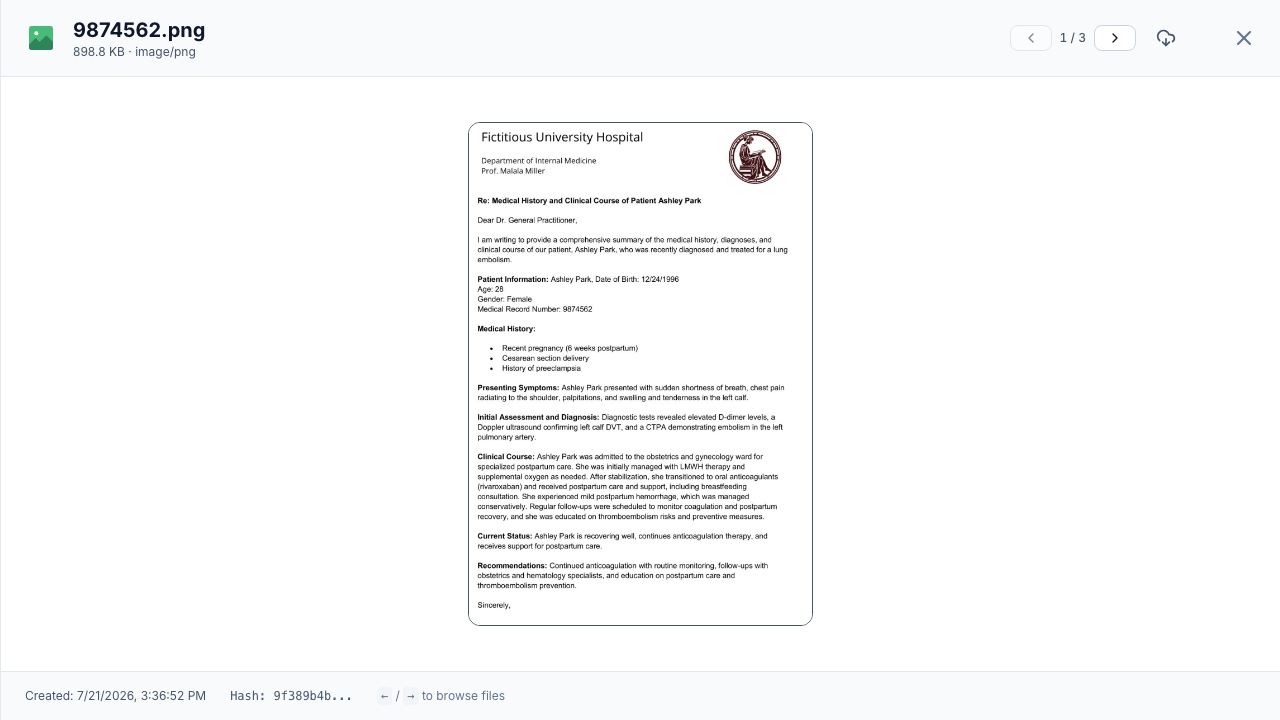
Rendering depends on the type:
- PDF — inline viewer (embedded iframe).
- Images — shown directly, scaled to fit.
- CSV/XLSX — a table of the first 50 rows, parsed with your saved import settings (encoding, delimiter, header, sheet). The configured ID column is highlighted in the primary color and the Text columns in green, with chips below the table naming them; long text-column cells (over 80 characters) truncate with a …more link that opens the full value in a dialog with a Copy button. A footer line notes when only part of a larger file is shown.
- TXT — plain-text view.
- Other types fall back to a Download File button.
Previews are lazy and never leak
The preview fetches content only when it opens, and re-fetches when you page to another file — a stale response for the previous file can't overwrite the one you're now viewing. Blob URLs for PDFs/images are revoked as you move on.
Configuring CSV / XLSX imports
Spreadsheets need an import configuration before they can be preprocessed. Until configured, the file shows a yellow Needs Import Config badge; click Configure to open the import dialog. (Re-opening a configured file shows Edit Import Configuration and pre-fills your saved settings.)
The dialog opens with a preview of the first 25 rows (re-parsed live as you change the options below; a caption reports how many rows are shown). If the preview can't be loaded, an inline error with Retry appears instead.
Parse options
- Encoding — chosen from the detected encodings (e.g.
utf-8,latin1). - Delimiter (CSV only) — Comma, Semicolon, or Tab.
- File contains header row toggle — when off, columns are labelled Column 1, Column 2, …
- Sheet selector — for XLSX workbooks with multiple sheets; defaults to the first sheet.
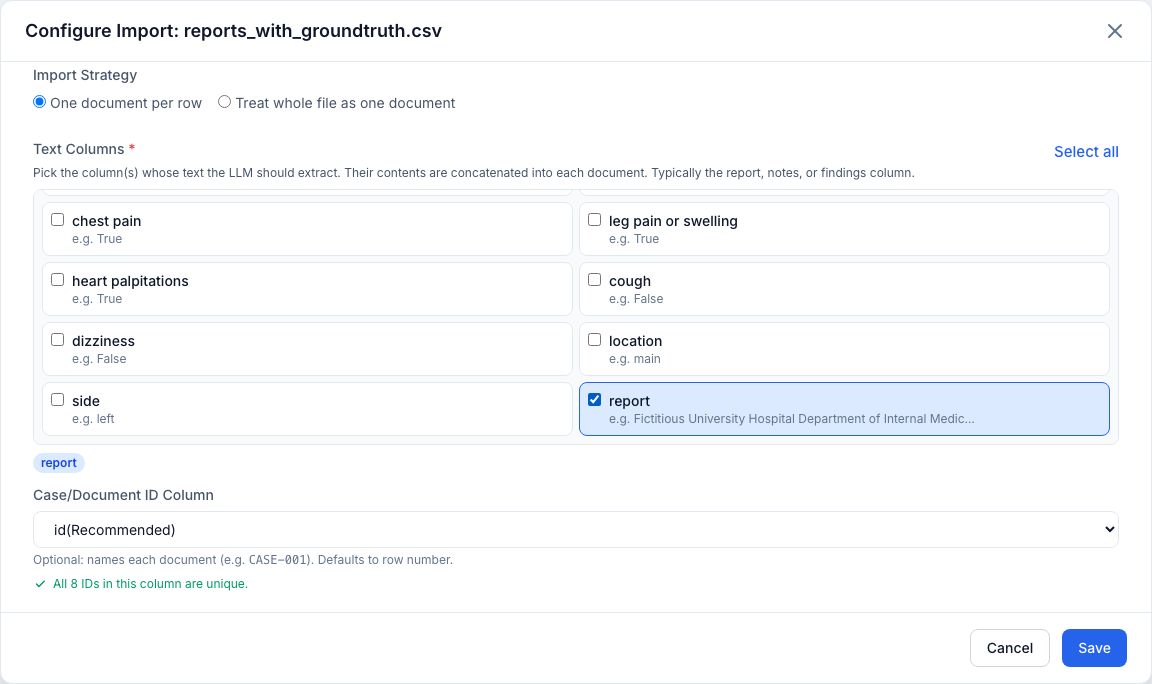
Import strategy
- One document per row (
row_by_row) — each row becomes its own document. - Treat whole file as one document (
full_document) — the entire table becomes a single document.
Row-by-row options (shown only when One document per row is selected)
- Text Columns (required) — a checkbox grid of every column, each showing a sample value (from the first non-empty row) to help you recognise it. Tick the column(s) whose text the LLM should extract (typically the report / notes / findings column); their contents are concatenated into each document. A Select all shortcut ticks every column, and the current picks are echoed as blue chips beneath the grid. At least one column is required — otherwise Save is disabled and a red hint appears.
- Case / Document ID Column — names each document (e.g.
CASE-001). Defaults to (Row number). Columns whose names look like identifiers (id,case_id,patient_id,identifier,studyid,record_id) are auto-guessed as the default and flagged (Recommended) in the dropdown.
IDs must be unique
When you pick an ID column, the app validates it against the whole file (debounced, server-side). While it checks you'll see "Checking uniqueness…" and Save stays disabled. The result is one of:
- All N IDs are unique — a green check; you're good to save.
- Not unique — a red panel listing the offending values and how many times each appears (empty values are called out), with a count of any further duplicates. Duplicate or empty IDs block saving.
- Column not found — an amber warning if the chosen column no longer exists under the current parse settings.
Fix the data or fall back to (Row number). This prevents documents from
colliding or being named nan. As a safety net, the save endpoint
re-validates server-side and rejects duplicates even if the live check was
skipped.
Saving stores the configuration on the file and clears its Needs Import Config badge. Closing with unsaved edits prompts you to Discard changes or keep editing. When configuring several files in a batch, the dialog advances to the next unconfigured file automatically.
Deleting files
Delete a single file with its trash action, or several at once via the Delete button in the batch bar (up to 200 at a time).
Before deleting, the dialog shows an impact preview — how many documents, extraction runs, groups, extraction results, and evaluation metrics depend on the file — and a cascade checkbox.
Cascading deletes
- A file that is currently being preprocessed cannot be deleted; cancel the preprocessing run first.
- A file linked to documents requires confirming the cascade, which also removes dependent extraction runs, groups, and evaluation data. This is irreversible — take a backup if unsure.
Batch actions
Selecting one or more files reveals a floating action bar:
- A "N needs config" warning if any selected spreadsheet lacks import config.
- Configure Preprocessing (or Configure Files First if configuration is still needed) — see Preprocessing.
- Delete and Clear selection.
Next step
Once your files are uploaded (and any spreadsheets configured), select them and move on to Preprocessing to extract their text.