Quickstart walkthrough
The walkthrough below is the canonical end-to-end example — from a CSV of eight medical reports to evaluated extraction results — using the original LLMAIx example dataset, schema, and prompt.
Tip
For a control-by-control reference of each step, see the User guide.
Usage Example — Information Extraction from Medical Reports
[!IMPORTANT] This is a research prototype. Extracted results can be inaccurate. Always check outputs before using them in practice.
This guide walks through a complete end-to-end example: from a CSV of medical reports to evaluated extraction results. It uses the 8 fictitious lung-embolism reports that ship with the original LLMAIx repository, so you can reproduce it with the original JSON schema and prompt.
It mirrors the workflow tabs inside a project:
The Example Dataset
The file backend/tests/files/reports_with_groundtruth.csv contains 8 fictitious discharge letters (the report column) plus an id column and one column per label holding the ground-truth value:
| Column | Type | Values |
|---|---|---|
id |
string | e.g. 9874562.pdf |
shortness of breath |
boolean | True / False |
chest pain |
boolean | True / False |
leg pain or swelling |
boolean | True / False |
heart palpitations |
boolean | True / False |
cough |
boolean | True / False |
dizziness |
boolean | True / False |
location |
enum | main / segmental / unknown |
side |
enum | left / right / bilateral |
report |
text | the full report |
We will use this single CSV twice:
- As the input for extraction — each row becomes one document (the
reporttext). - As the ground truth for evaluation — the per-label columns are compared against the LLM output.
[!TIP] The column names happen to match the schema keys, which makes the mapping step later a bit quicker — but it's not required.
The JSON Schema
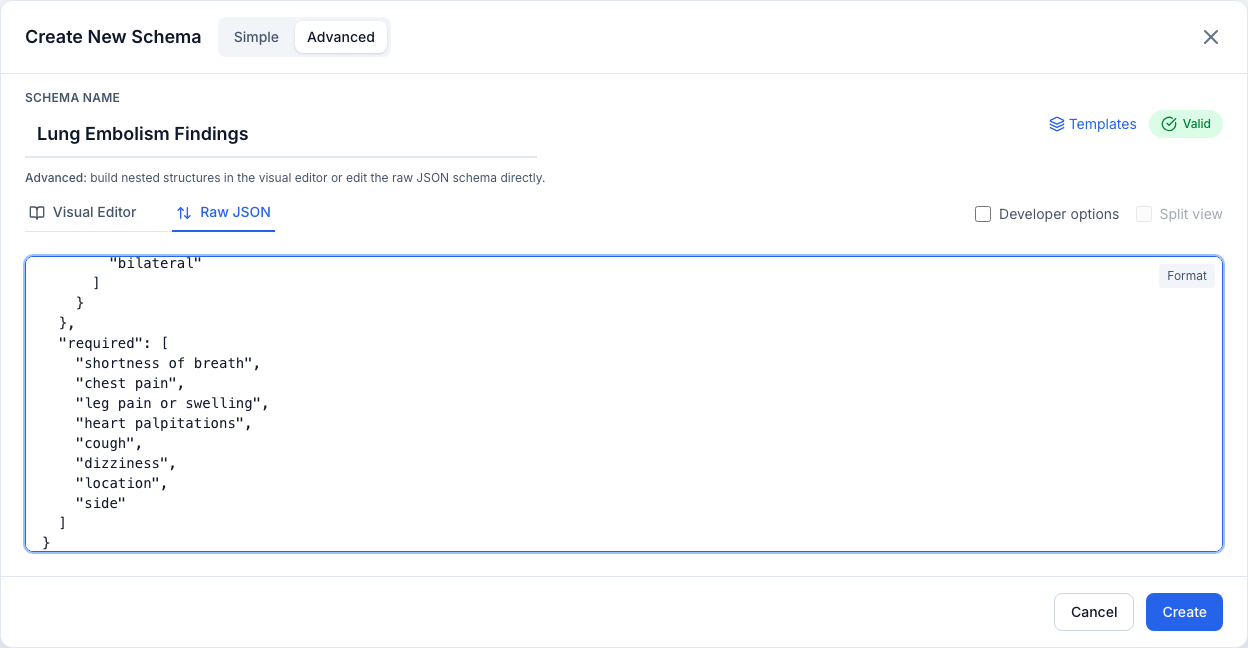
Create a schema with these 8 fields. This is the same schema used in the original LLMAIx information-extraction tutorial:
{
  "type": "object",
  "properties": {
    "shortness of breath": { "type": "boolean" },
    "chest pain": { "type": "boolean" },
    "leg pain or swelling": { "type": "boolean" },
    "heart palpitations": { "type": "boolean" },
    "cough": { "type": "boolean" },
    "dizziness": { "type": "boolean" },
    "location": { "type": "string", "enum": ["main", "segmental", "unknown"] },
    "side": { "type": "string", "enum": ["left", "right", "bilateral"] }
  },
  "required": [
    "shortness of breath",
    "chest pain",
    "leg pain or swelling",
    "heart palpitations",
    "cough",
    "dizziness",
    "location",
    "side"
  ]
}
You can either build it in the Visual Editor tab or paste it into the Raw JSON tab — both are available in Advanced mode of the schema editor.
The Prompt
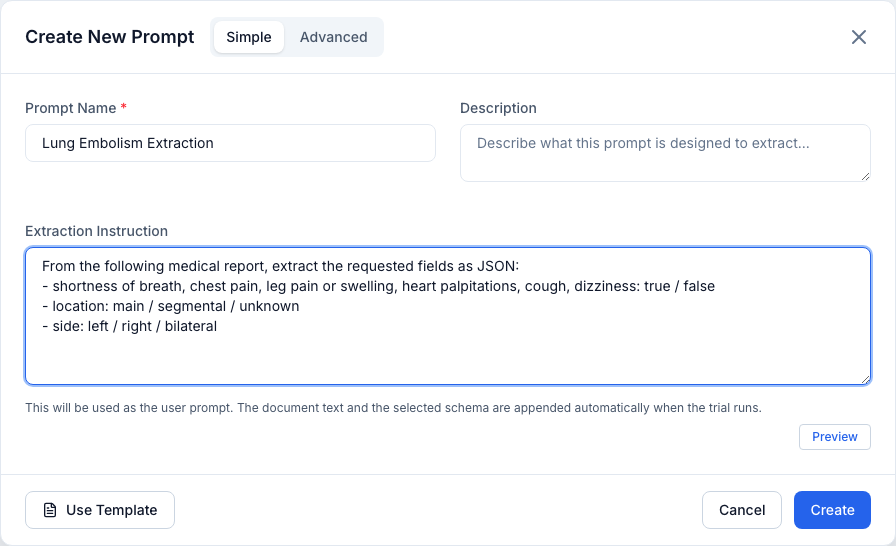
Use the simple mode of the prompt editor. In simple mode you only write the extraction instruction (the user prompt) — the document text and the JSON schema are both injected automatically by the app when the extraction runs, so you don't need a placeholder and you don't need to paste the schema into the prompt.
Extraction instruction (user prompt):
From the following medical report, extract the following information and return it in JSON format:

    shortness of breath: true / false
    chest pain: true / false
    leg pain or swelling: true / false
    heart palpitations: true / false
    cough: true / false
    dizziness: true / false
    location: main / segmental / unknown
    side: left / right / bilateral
[!NOTE] The document text is appended automatically with clear
--- DOCUMENT CONTENT ---markers, and the selected schema is appended as a JSON block. There's no need to reference the report or the schema in the instruction itself.
Step 1 — Files & Preprocessing
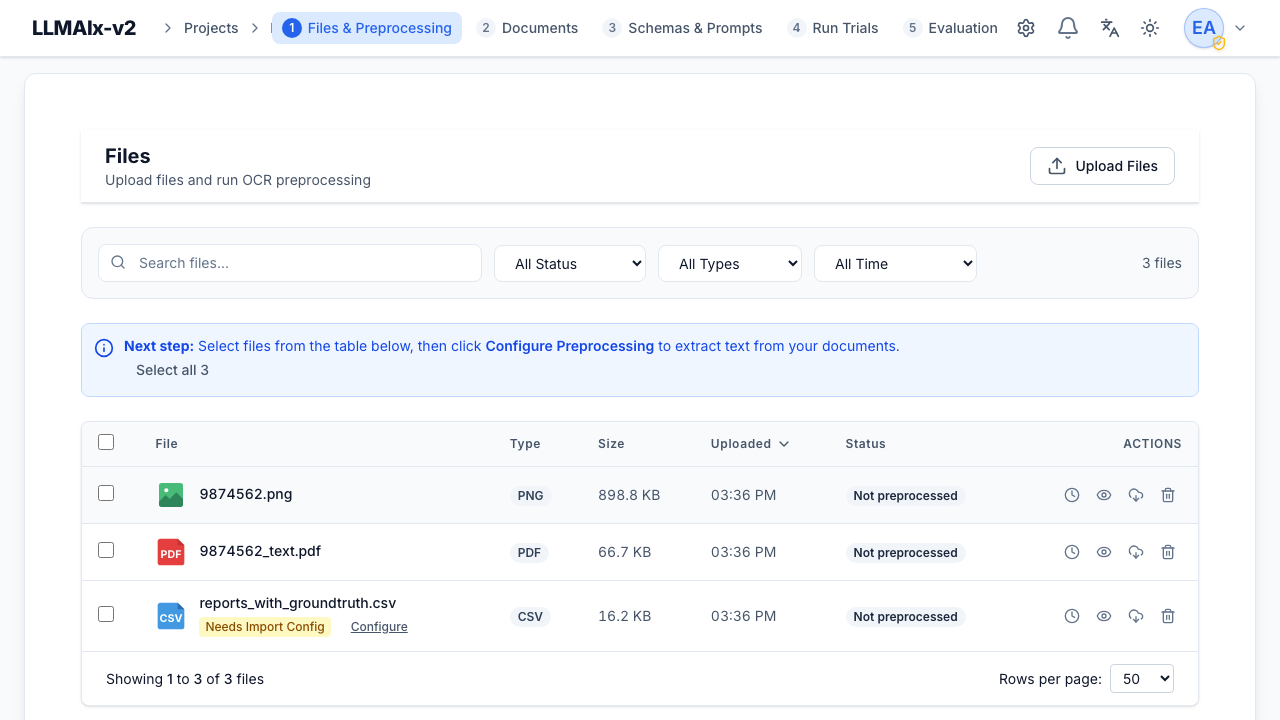
- Create a Project (top-level container) from the Projects page.
- Open the project and stay on the Files & Preprocessing tab.
- Upload
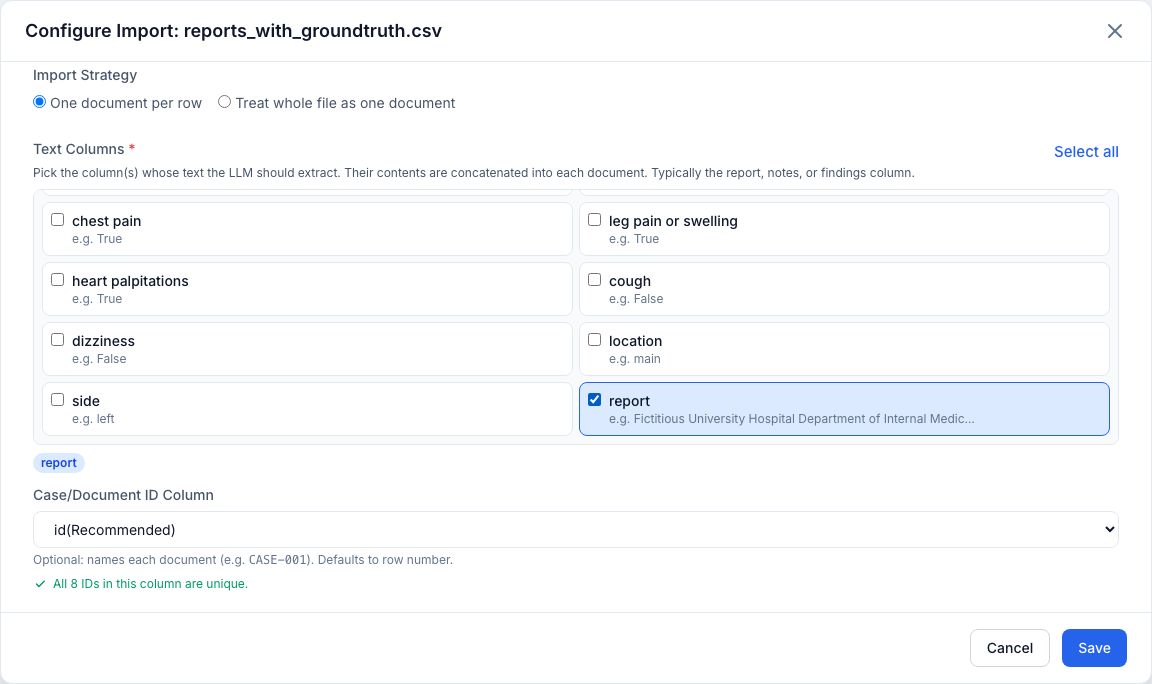
reports_with_groundtruth.csv. - The file shows a Needs Import Config badge — CSV/XLSX files require you to configure how rows become documents before you can preprocess. Click the file's Configure button to open the import dialog:
- Import Strategy: select One document per row (row-by-row).
- Text Columns: select
report(required — this column's content becomes each document's text). - Case/Document ID Column: select
id(optional but recommended — used for document naming, so each document is identifiable by9874562.pdf, etc.).
- Run preprocessing. Since the report text is already plain text in the CSV, no OCR is needed — every row becomes one
Documentwith thereporttext and itsidas the document name.
When preprocessing finishes, you'll have 8 documents (one per report).
[!NOTE] For PDFs or images you would instead pick an OCR engine here (Quick/Docling, Mistral OCR, or Vision LLM OCR). See the OCR engines guide.
Step 2 — Documents (optional review)
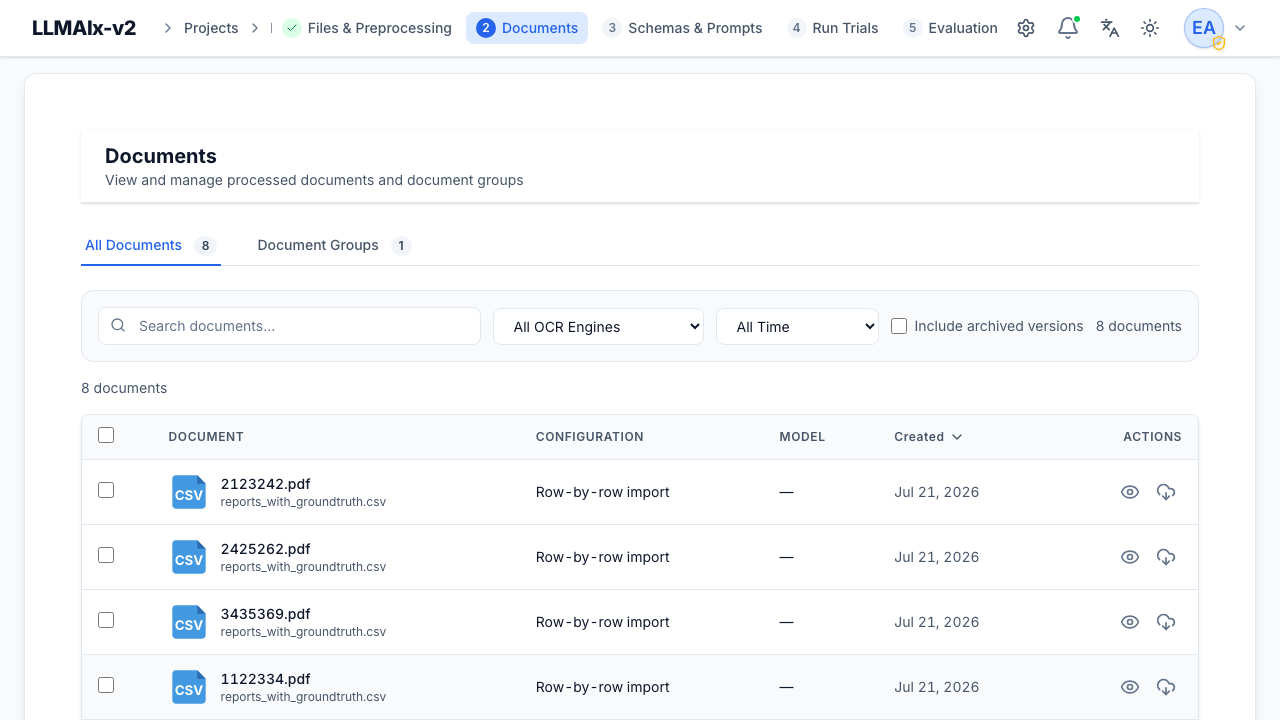
On the Documents tab you can review the 8 extracted documents and confirm the text looks correct. The tab has two sub-views: All Documents and Document Groups. A document group is a saved selection of documents you can start an extraction run against — select documents in the list and click Create Group, or create one from the Document Groups tab. This is optional: extraction runs can also select documents individually.
Step 3 — Schemas & Prompts
On the Schemas & Prompts tab, switch between the JSON Schemas and Extraction Prompts sections:
- In JSON Schemas, create a new schema. Switch the editor to Advanced mode, which gives you two tabs: Visual Editor (build the tree — 6 boolean fields +
locationandsideenums) and Raw JSON (paste the schema JSON from above into a textarea). - In Extraction Prompts, create a new prompt. In simple mode, just paste the extraction instruction from above into the user-prompt field — the document text and schema are injected automatically, so no system prompt or placeholder is needed.
Step 4 — Extraction Runs
On the Extraction Runs tab (extraction runs were formerly called "trials"; the API and database still use the term trial), click Start Extraction Run. The dialog has a Simple/Advanced toggle (Simple is the default). In order, pick:
- Prompt — the extraction instruction from Step 3.
- Schema — the 8-field schema from Step 3.
- LLM Model — models are fetched from your configured LLM provider (the system default set in the admin panel). In Advanced mode you can override with custom API settings (base URL + API key) to point at any OpenAI-compatible endpoint.
- Documents — choose a selection mode: Individual (pick the 8 documents), Groups (pick a document group), or Smart.
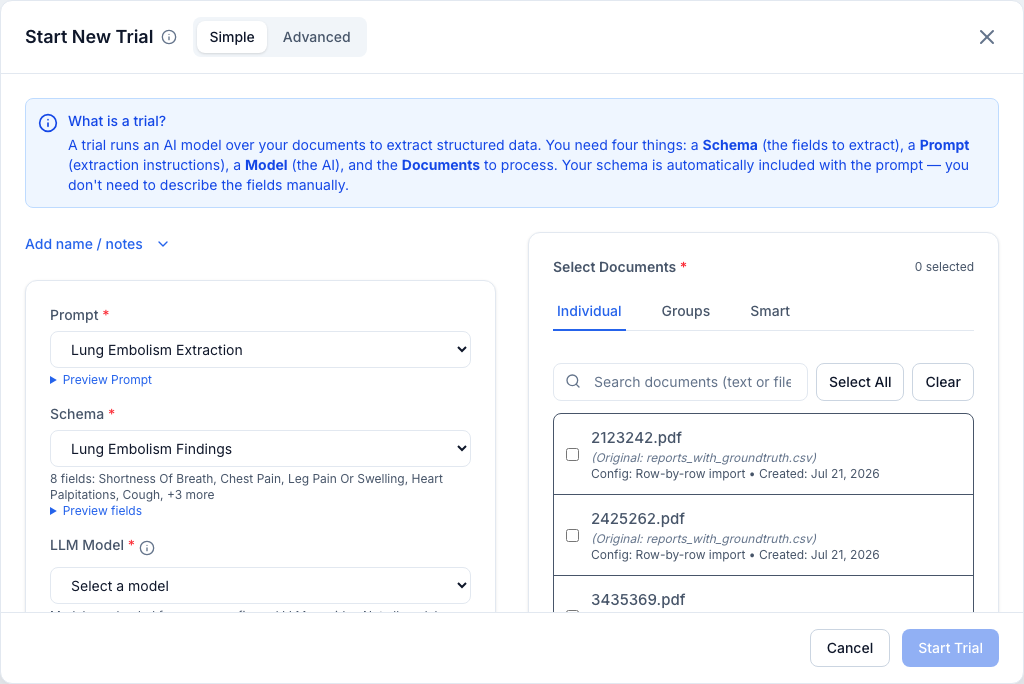
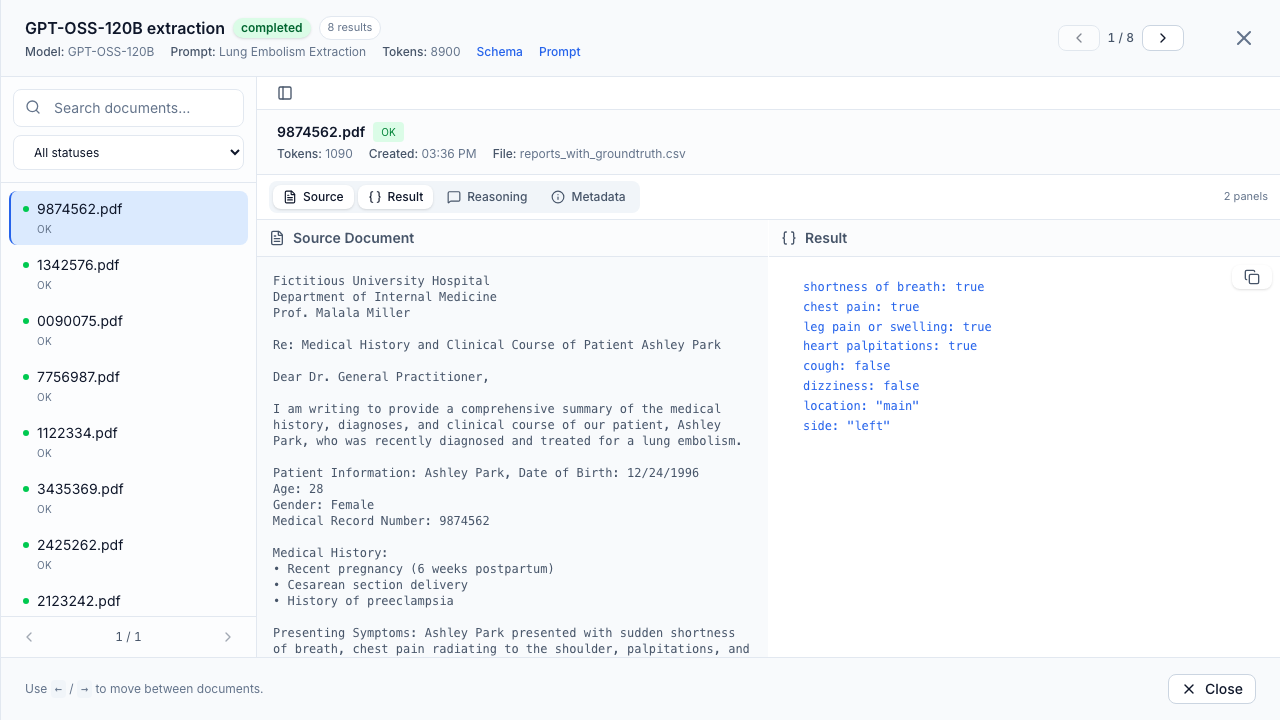
Then start the run. The app sends each document's report text to the LLM and stores one result per document, containing the JSON the model produced.
After the run completes, open it to inspect the per-document JSON output side-by-side with the source text.
Step 5 — Evaluation
Now compare the extraction run's output against the ground-truth labels.
- On the Evaluation tab, upload the ground truth: the same
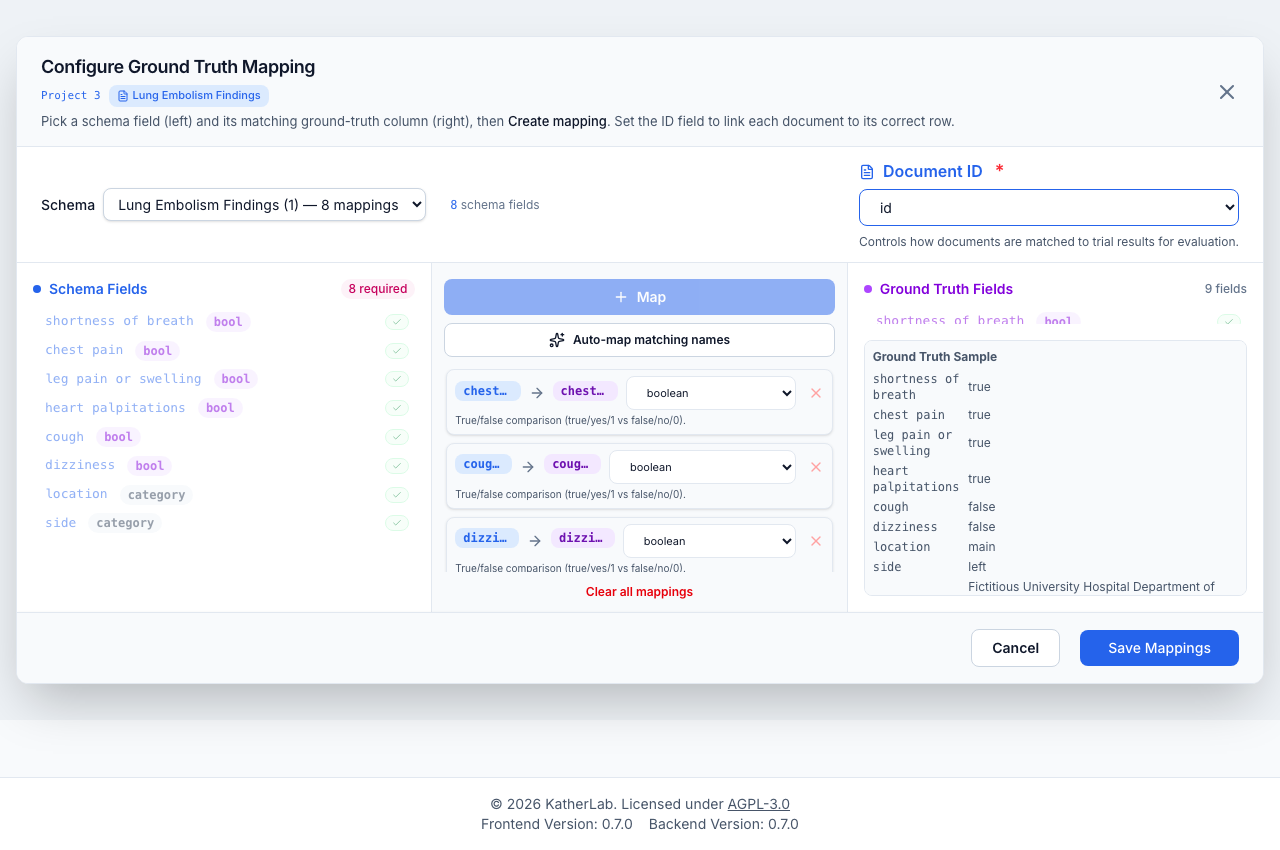
reports_with_groundtruth.csvfile. (You can also reuse a ground-truth file you've uploaded before — uploaded files are listed and selectable.) Select it in the ground-truth list. - Click Configure mappings. This opens a three-pane dialog — schema fields on the left, ground-truth columns on the right, and a center panel where you pair them. Here you:
- Pick the ID column — the column whose values match your document identifiers. Because we used
idas the case-ID column during preprocessing, the document names (9874562.pdf, …) and the ground-truth IDs match automatically — no manual pairing. - Add field mappings — select a schema field, select a ground-truth column, and click Map. The names don't have to match; if they do, Auto-map all fields pairs them automatically (case-insensitive), which is why this file uses the same names as the schema.
-
Choose a comparison method per field:
Method What it does Use for exactExact text match (case-insensitive by default) IDs, codes, enums fuzzyApproximate string match (correct if similarity ≥ threshold, default 85) Free text with minor variations numericNumeric comparison within a tolerance (default 0.001) Measurements, counts, lab values booleanTrue/false comparison ( true/yes/1vsfalse/no/0)Boolean fields categoryCategorical match with optional synonym mappings; builds a confusion matrix Enum/categorical fields dateDate equality across common formats Dates For this example: use boolean for the six symptom fields, and category (or exact) for
locationandside.
- Save the mappings (they're stored on the ground-truth file, so you only do this once).
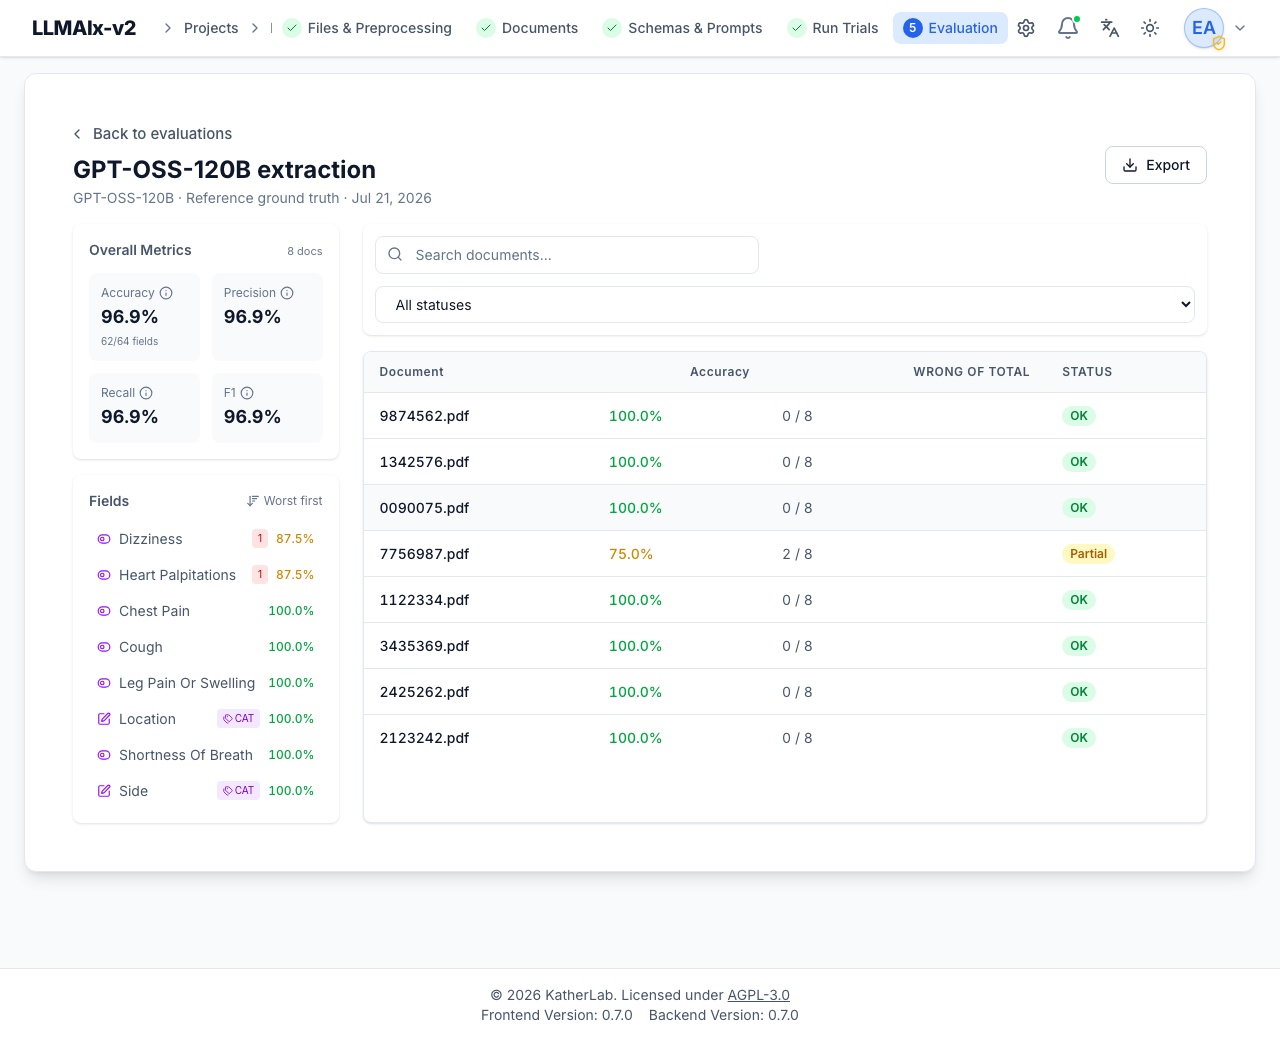
- Click Evaluate Extraction Run, pick the run you started in Step 4, and run the evaluation. You get:
- Overall metrics — accuracy, plus precision, recall, and F1 (a wrong value counts as both a false positive and a false negative; a missing value is a false negative; an extra value is a false positive).
- Per-field metrics — accuracy, precision, recall, F1, and an error breakdown per field.
- Confusion matrices for categorical fields (
location,side). - Per-document metrics — accuracy per report, with lists of missing and incorrect fields, so you can see exactly where the model failed.
[!NOTE] Boolean comparison accepts
true/false,yes/no, or1/0on both sides (case-insensitive). Forcategory, the model's output must match the ground-truth class — which is why the schema enums (main/segmental/unknownandleft/right/bilateral) line up with the CSV columns.
Summary
| Step | What you do | Result |
|---|---|---|
| Files & Preprocessing | Upload CSV, pick report as text column, id as case ID, row-by-row |
8 text documents |
| Documents | Review / optionally group into a document group | Documents (or a group) to run extraction on |
| Schemas & Prompts | Add the 8-field JSON schema + extraction prompt | Reusable schema & prompt |
| Extraction Runs | Run extraction over the 8 documents with your LLM | 8 JSON results |
| Evaluation | Upload the same CSV as ground truth, pick ID column, map fields + comparison methods | Accuracy/P/R/F1 + per-field/per-document metrics + confusion matrices |
This is the same scenario the original LLMAIx tutorial demonstrates — now with persistent projects, user management, and a structured evaluation view.